A Simple Databricks Deployment with Github Actions
February 16, 2025
I recently set up a Databricks pipeline deployment using Databricks Asset Bundles, deployed with Github Actions. While Databricks has lots of great documentation, I also found some holes in said documentation that led to a lot of frustration. I thought I’d make this post to contribute the deployment I settled on with the community, the pitfalls I stumbled on, and the solutions I discovered to resolve those.
If you follow this guide, here’s the end result you can expect:
Interested? Read on!
Getting Started
To get straight into it, here’s a public repo with a simple deployment you can use as a guideline for your own deployment: https://github.com/evanaze/dbx-asset-bundle-deployment.
Installation
To get started, all we need is the Databricks CLI: https://docs.databricks.com/aws/en/dev-tools/cli/install. Follow the instructions to install the CLI.
Repo layout
The repository is layed out as follows:
- databricks.yml - The primary Databricks Asset Bundle configuration.
- requirements-dev.txt - Requirements for developing on this project. This is not used yet
- resources - A repo for resources managed by Databricks Asset Bundles
- src - All Python & SQL code and notebooks lives here
- tests - All testing code lives here
- integration - Integration tests
- unit - Unit tests
For this example, we’re going to have a simple 3 environment setup, with one Databricks workspace per environment:
- development (aka dev) - this environment is for developing new features. Developers should be able to simultaneously develop here without interferring with each other, and it’s a good practice to automatically deploy to development on each commit to a feature branch.
- staging (aka staging) - this environment is meant to be a close replica of production so we can end-to-end test our whole system.
- production (aka prod) - this is the environment we serve to customers. In this environment up-time and being free from bugs is crucial.
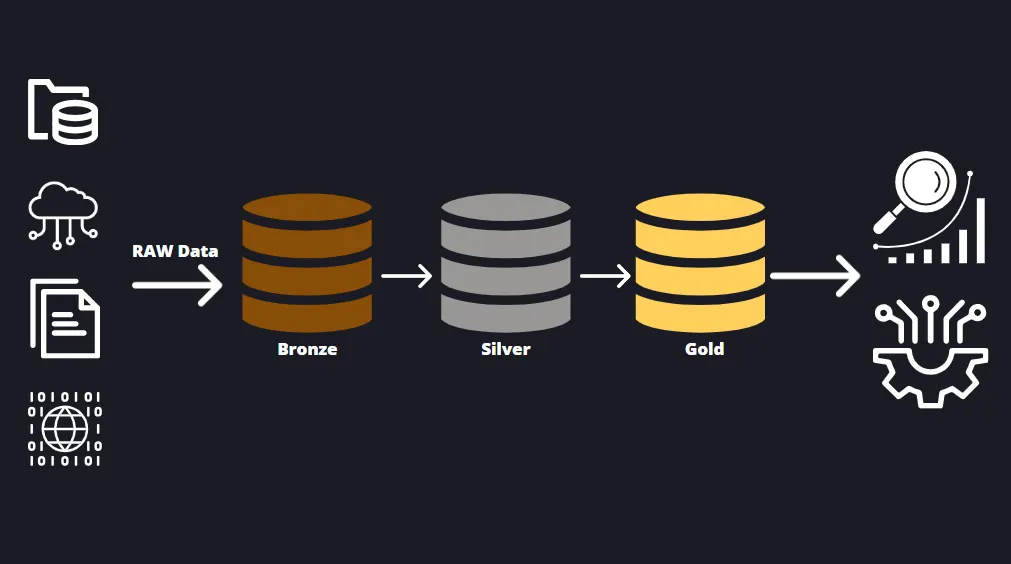
We’re also going with a medallion architecture1, meaning we have three schemas in each environment:
- bronze - this is our landing zone for raw data. We dump everything we’d like to collect here without enforcing any kind of schema.
- silver - this schema contains all intermediate representations between raw data the data we present to end-users.
- gold - these are tables for business end-users.
There is one Delta Live Table 2 pipeline in the src/ folder.
Let’s see how we deploy it using Github Actions and Databricks Asset Bundles.
Deploying Resources to Databricks
From Databricks’ perspective, the pipeline is defined in resources/events_raw.pipeline.yml.
Here’s the file in its entirety:
# Raw events data ingestion
resources:
  pipelines:
    events_raw:
      name: events_raw
      catalog: ${bundle.environment}
      target: bronze
      continuous: true
      clusters:
        - label: default
          num_workers: 1
          node_type_id: "m5d.large"
          autoscale:
            min_workers: 1
            max_workers: 4
      libraries:
        - file:
            path: ../src/events_raw.py

      configuration:
        bundle.sourcePath: ${workspace.file_path}/src
This configuration file includes:
- The default schema (under the
targetsection) and data catalog to which we write the Delta Live Tables. - The cluster size that will be associated with the pipeline.
- The fact we should set the pipeline as a continuous pipeline.
- Note: when we deploy to the dev environment (more on that later), the pipeline will only run briefly, whereas when we deploy to staging or production it will actually run continuously. This is a nice money-saving feature.
- The source code to be executed in this pipeline. This is defined under:
libraries:
  - file:
path: ../src/events_raw.py- Where the bundle will deployed within Databricks. This is set to
${workspace.file_path}/srcwhich expands to/Workspace/Users/myuser@example.com/.bundle/src
Speaking of the bundle, let’s define that before we go much further.
Databricks Asset Bundles
We use Databricks Asset Bundles to define our resources within Databricks and how those resources exist in different environments.
In my example repo, the “bundle” - or group of resources and definitions for our Databricks environment - is centrally defined in the root of the repository in the databricks.yml file.
Once you define your pipeline and resources in a bundle configuration, Databricks provides some CLI commands that make it simple to run and deploy or code to Databricks. For example:
databricks bundle run events_raw: manually run the pipeline.databricks bundle deploy -t dev --auto-approve: deploy the bundle to the dev environment
Now, let’s go over the databricks.yml file.
# This is a simple Databricks asset bundle deployment
# See https://docs.databricks.com/dev-tools/bundles/index.html for documentation.
bundle:
  name: dbx-deployment_bundle

# Importing resources. These are split into their own files for modularity
include:
  - resources/*.yml

# This section defines the target deployment environments
targets:
  dev:
    mode: development
    run_as:
      service_principal_name: { dev_sp }
    permissions:
      - level: CAN_MANAGE
        service_principal_name: { dev_sp }
      - level: CAN_VIEW
        user_name: ${workspace.current_user.userName}
    default: true
    workspace:
      host: { dev_host }
      root_path: /Workspace/Users/${workspace.current_user.userName}/.bundle/${bundle.name}/${bundle.target}

  stage:
    mode: production
    git:
      branch: main
    run_as:
      service_principal_name: { stage_sp }
    permissions:
      - level: CAN_MANAGE
        service_principal_name: { stage_sp }
      - level: CAN_VIEW
        user_name: ${workspace.current_user.userName}
    workspace:
      host: { stage_host }
      root_path: /Workspace/Users/${workspace.current_user.userName}/.bundle/${bundle.name}/${bundle.target}

  prod:
    mode: production
    git:
      branch: main
    run_as:
      service_principal_name: { prod_sp }
    permissions:
      - level: CAN_MANAGE
        service_principal_name: { prod_sp }
      - level: CAN_VIEW
        user_name: ${workspace.current_user.userName}
    workspace:
      host: { prod_host }
      root_path: /Workspace/Users/${workspace.current_user.userName}/.bundle/${bundle.name}/${bundle.target}
Some things to note here:
- We have 3 “targets” that map to our three environments/workspaces: dev, stage, and prod.
- The dev target is deployed as “development”, while the other 2 is deployed as production. This means continuous pipelines in dev will not run continuously, saving us cost.
- All bundles are deployed using a service principal associated with their workspace. E.g.
dev_sp,stage_sp, andprod_sp. - The
includeblock shows that we’re importing resources from theresourcesfolder.
With the explainations out of the way, let’s set up Databricks and this repo for deploying our pipeline.
Developing
I’m going to assume you have 3 Databricks workspaces set up for your dev, staging, and production environments. If you’re using a non-premium Databricks account, you won’t be able to create multiple workspaces, so this example will take some significant changes to work for your situation. Once we have those workspaces, we need to set up the service principals and Github environments for each of our environments.
Setting up service principals
Note: you’ll need to have admin access in order to do this section.
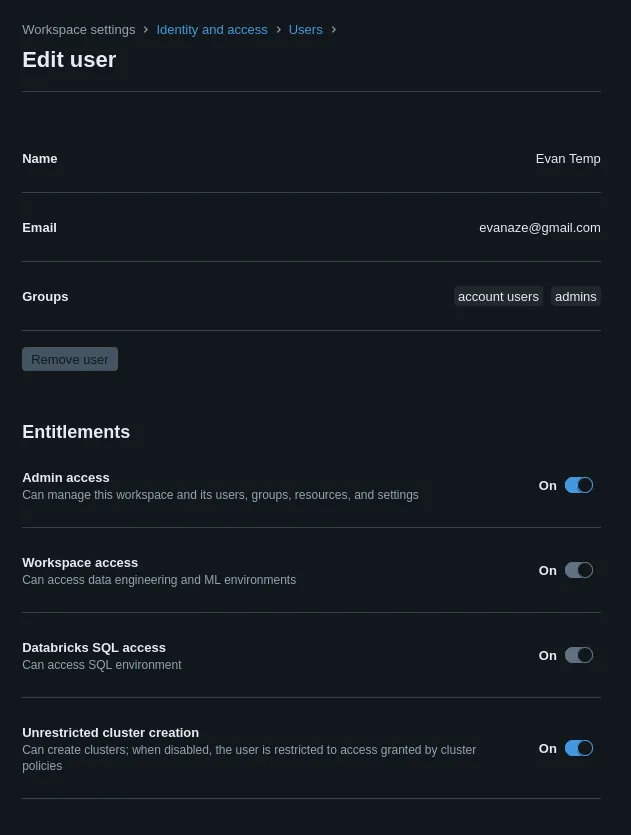
Let’s first create a service principal in each of your environments. These service principals are the ones that deploy the bundle to Databricks. Here’s the official guide from Databricks if you’d rather use that: https://docs.databricks.com/aws/en/admin/users-groups/service-principals.
To set one up, open the Settings page by clicking the circle in the top right of the screen and “Settings” in the resulting dropdown. Then, navigate to the “Identity and access” tab on the left. Click “Manage” next to the last item in the “Identity and access” page titled “Service Principals”.
For each workspace (dev, stage, and prod), we’re going to:
- Create a service principal
- Create an OAuth token so we can authenticate as the service principal
- Save the token in a secure place (Don’t forget this step! Otherwise your future self will rue the day)
- Grant the service principal appropriate permissions
This token will then be added to Github using Github’s environments feature and passed to the Github Actions which deploy the bundle.
1. Create the service principal
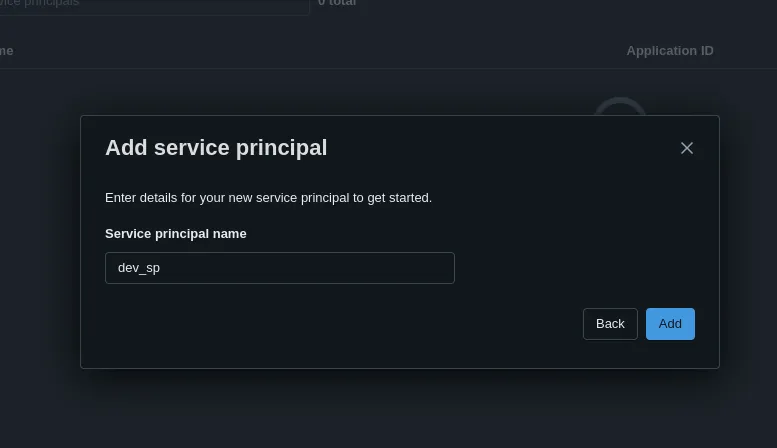
Pretty simple - just click “Add service principal” and “Add new” in the resulting popup.
I named my service principals dev_sp, stage_sp, and prod_sp, but you could name them whatever you’d like.
One last step while we’re here: Under the “Entitlements” section of the “Service principal details” page, check “Allow cluster creation” and then click the “Update” button. We need to do this because we define clusters in our asset bundle, so the service principal will be responsible for creating and managing bundles.
2. Create an OAuth Token
To generate a new OAuth token, simply navigate to the “Secrets” tab and click the “Generate secret button.”
Fun thing to note here: the ID for the OAuth token is just the ID of the service principal itself.
3. Save the token in a secure place
Write the secret down on a sticky note, put it in a password manager (psst… put it in a password manager), save it in your browser. Either way, I don’t really care. I’m not the InfoSec police, but I did make a mistake by being lazy and not saving the secret when I created it the first time, and I want you to be better off than I.
Setting up Github
After we’ve gone through the last three steps for each of the three environments, we’re fortunately getting to the end of the “setup” phase, and hopefully you’ll be off and creating cool stuff in Databricks shortly.
Now we turn our attention to Github.
Click the “Settings” tab for your project and the “Environments” section in the left tab.
Create a new environment for each of dev, stage, and prod.
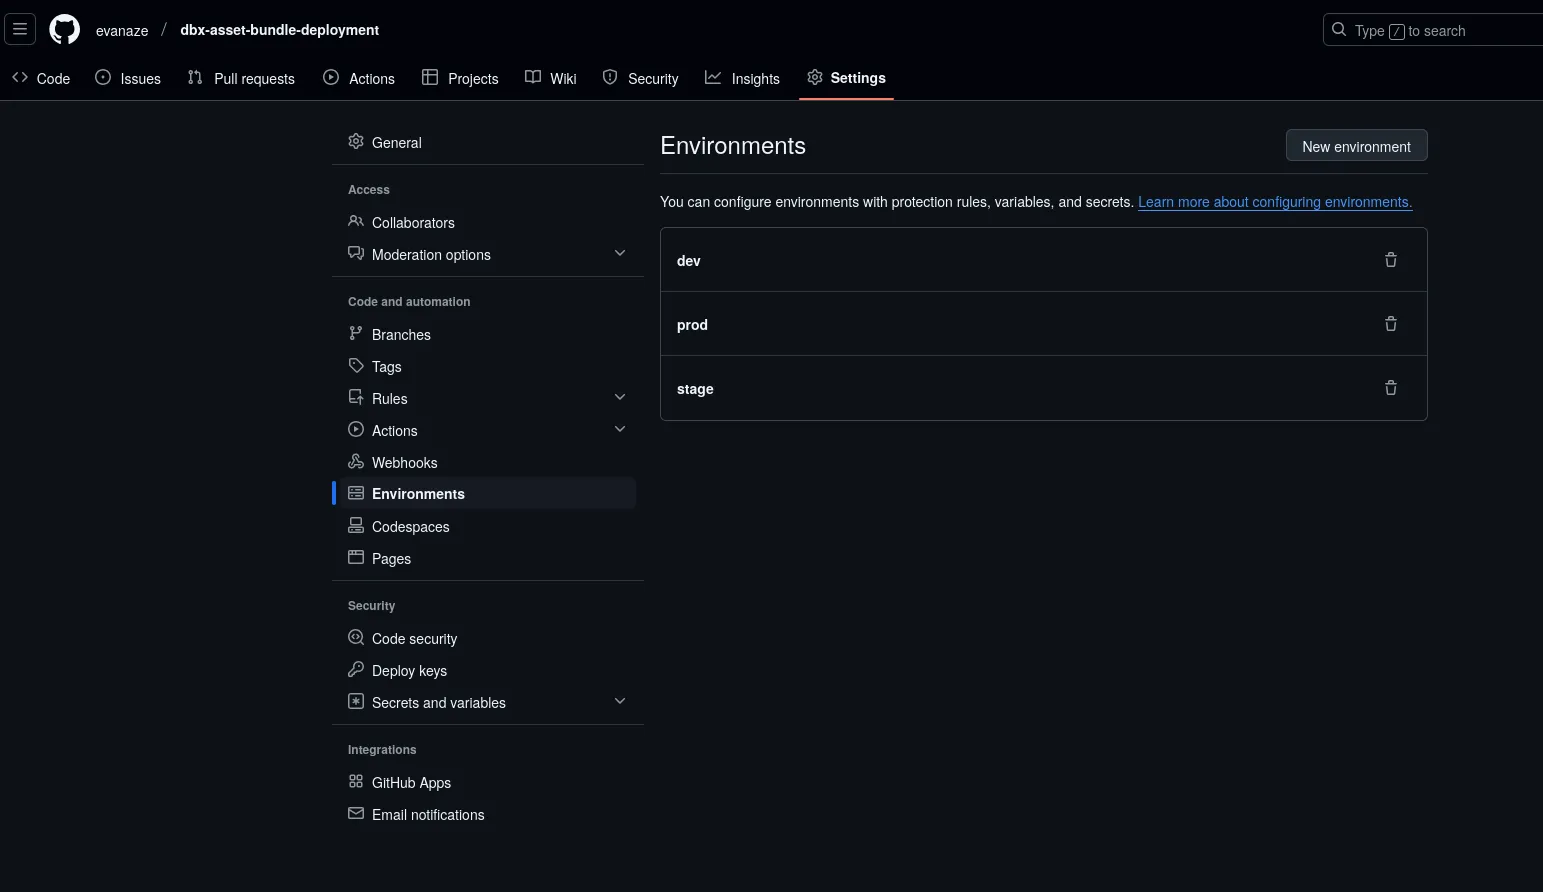
These will be helpful for organizing the variables and secrets for each Workspace in Databricks for our deployment scripts. Now open one of the environments you just created, and we’re going to add these variables and secrets.
Secrets
DBX_SP_SECRET: This will store the OAuth token secret for the service principal of the environment
Variables
DBX_HOST: This will store the Databricks host name3DBX_SP_ID: This will store the ID of the service principal of the environment
Here’s what it will look like once it’s set up:
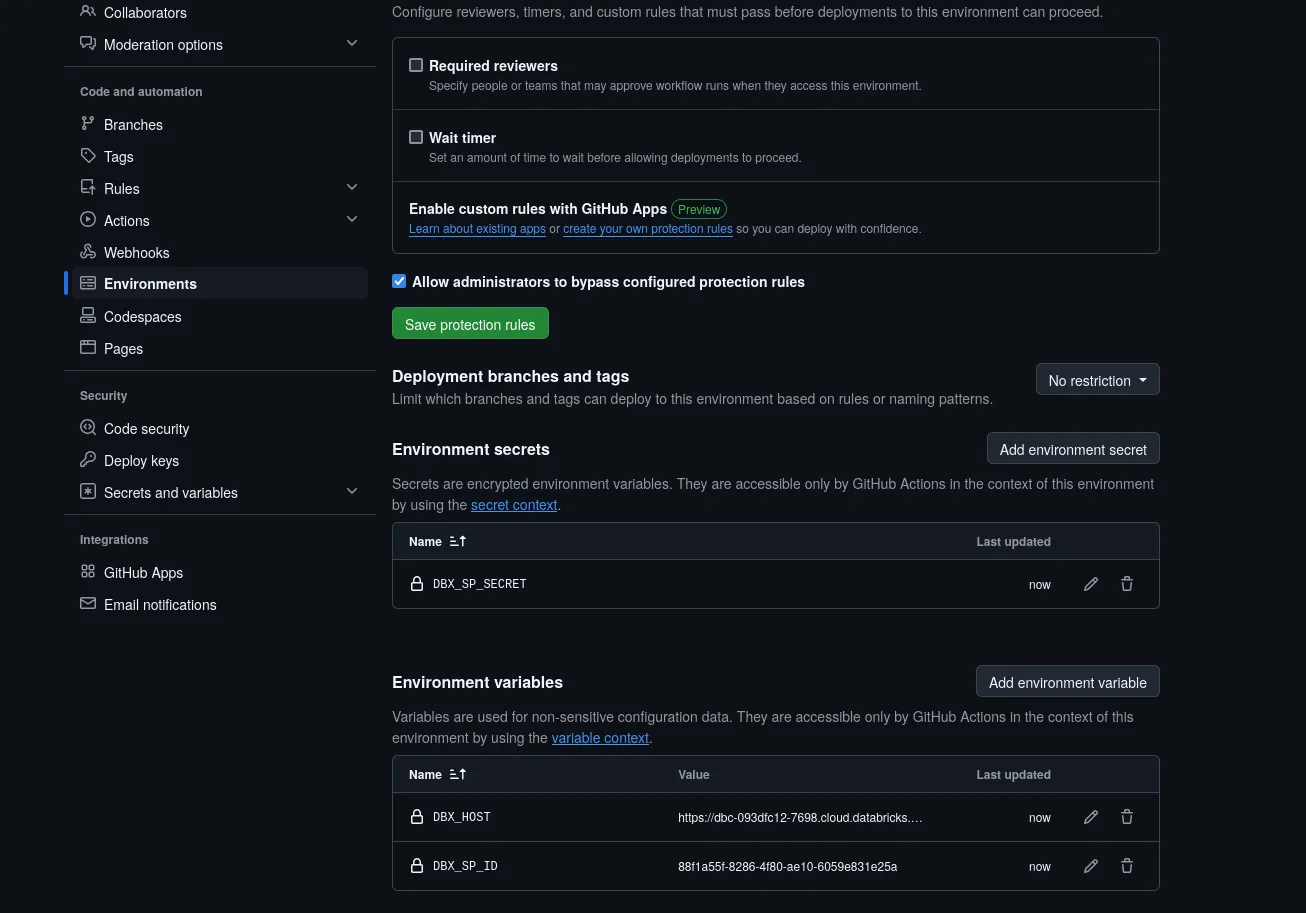
Do this for all three environments, and we are nearing the finish line.
All you need to do next to get this running is to add this info to the databricks.yml file in your repository.
{dev_sp} should get replaced with the ID of your Dev security principal, {dev_host} the host name of the Workspace, etc.
Putting it all together
Here’s the workflow we’ve created.
Open a branch in your repository.
Changes to this branch trigger the dev-ci.yml Github Action, which:
- Lints the code under the
src/folder and runs unit tests undertests/unit. - Deploys the bundle to the dev environment.
- Runs the
events_rawpipeline to validate that it will run successfully.
Once you’re happy with your new feature, simply merge it into the main branch and then the prod-cicd.yml pipeline will run.
This pipeline does the following:
- Deploys the bundle to the stage environment, updating the pipelines if necessary.
- Runs integration tests under
tests/integrationto make sure the feature looks good in stage before we deploy it to production. - Deploys the bundle to the production environment if the integration tests pass.
And you’re done! :partying_face: If you’ve made it this far, thanks for reading and I hope this guide was helpful. I created this to be the guide I wish existed when I was doing this for a customer, so in the next section I’ll go over some stuff that was either hard to find in the existing documentation or completely missing.
Common pitfalls
Here are some roadbumps I came across that ended up being larger time-sinks than I would have liked.
- When deploying the bundle to staging and production, we don’t need to execute
databricks bundle run events_raw. This will throw an error, in fact. All you need to do is deploy the bundle withdatabricks bundle deploy -t prod --auto-approveand Databricks will handle updating and/or running your pipeline for you. This assumes your pipeline is either continuous or is triggered by a job. - Authenticating myself with the CLI to act as a service principal was a challenge. Here’s a combination that works:
Edit your ~/.databrickscfg by adding the following, adding your hostname and OAuth token information:
[stage]
host =
databricks_client_id =
databricks_client_secret =
Execute commands you’d like to run as the service principal with the -p stage flag.
For example: databricks bundle summary -p stage -t stage
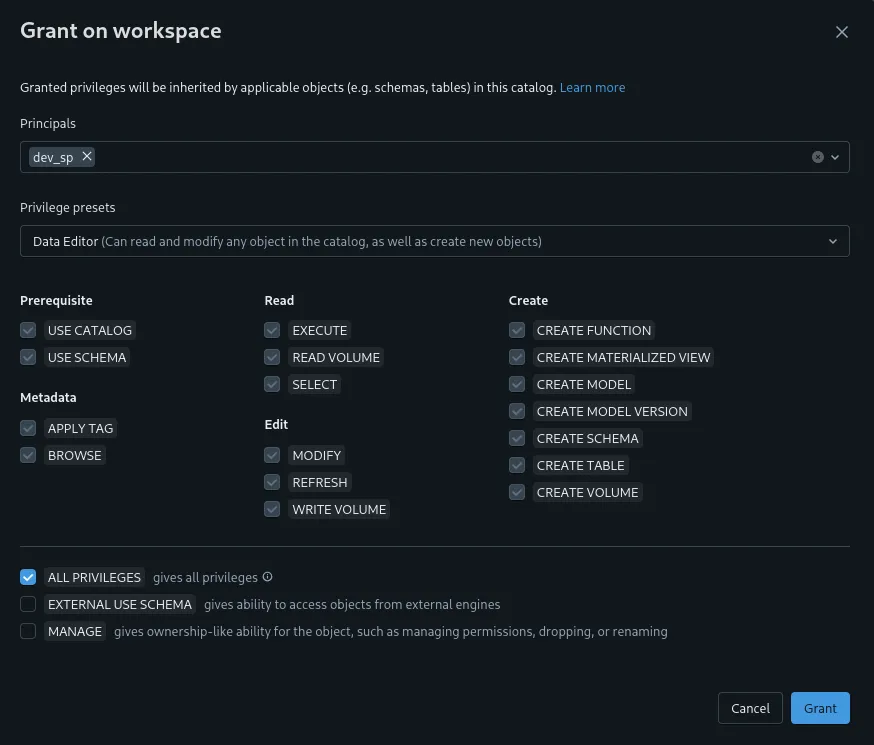
- After running the pipeline for the first time you’ll likely get a permissions error in the pipeline. This is because the service principal hasn’t been granted permission on the catalog (
dev,stage, orproddepending on the workspace name, in this case) that it had just created. In order to fix this, navigate to the catalog under the Catalog Explorer, select the Permissions tab, and click “Grant”. Select the service principal for that workspace under “Principals” and then select the button to grantALL PRIVILEGESto the service principal. Re-run the pipeline and enjoy either a working pipeline run or a fresh error to debug.
