🍓 How to Install NixOS on the Raspberry Pi 5

If you’re like me, you bought the new, shiny Raspberry Pi 5 and assumed you could boot NixOS on it, only to find out that the device is not yet supported. Dry those tears, because this guide is the exact steps I took to load NixOS onto my Raspberry Pi 5.
# Requirements
I will only be covering how to install NixOS onto a Micro SD card using a Mac, but if you’re handy you may be able to figure out how to install the OS onto a flash drive or NVMe stick.
- Raspberry Pi 5 (duh)
- A monitor with an HDMI port and a Mini HDMI to HDMI cable for connecting the RPi to your monitor. Here’s a link to one: https://www.raspberrypi.com/products/standard-hdmi-a-male-to-mini-hdmi-c-male-cable/
- A USB keyboard for typing on the terminal of the RPi.
- A USB stick for booting the OS. Note that the entire flash drive will be dedicated to NixOS booting, so either use a small 8-16 GB drive that you have lying around or back up a larger one before wiping it and installing the OS.
- A micro SD card which will be the RPi’s main source of storage.
Additionally, I used a Mac laptop to partition the boot drive and SD card, but you should be equally capable to do so with a Linux or Windows machine using their disk partitioning tools.
# Setup
We need to get the flash drive and SD card ready for the install.
The SD card is the trickier of the two. The whole drive needs to be Fat32, and we need the drive to have two paritions: a small partition for containing the custom firmware needed to run UEFI on the RPi 5, and the rest of the drive dedicated to the OS.
This was a challenge because MacOS makes it very confusing on how to make multiple partitions on an MBR partitioned drive 🙃. This is what worked for me.
# Erase the SD card
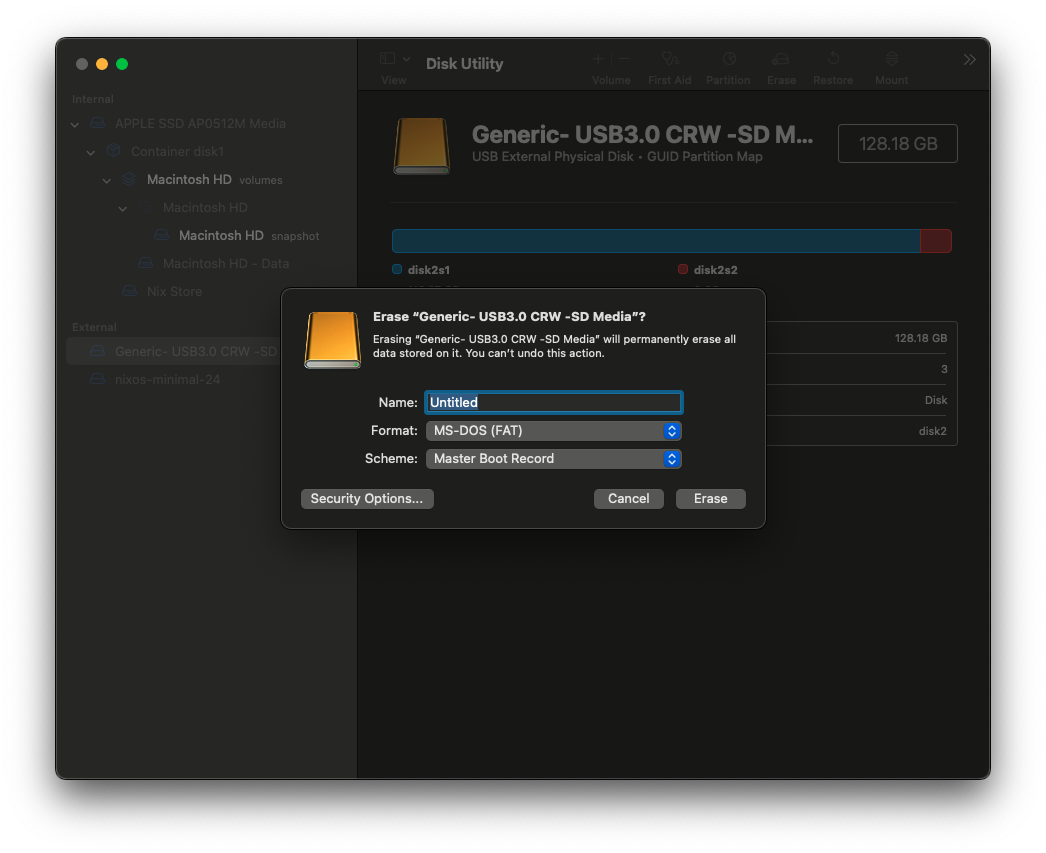
First, erase the SD card and format it as Fat32 MBR.
# Partition the SD card
Open the termin and find the name of your SD card with the command diskutil list.
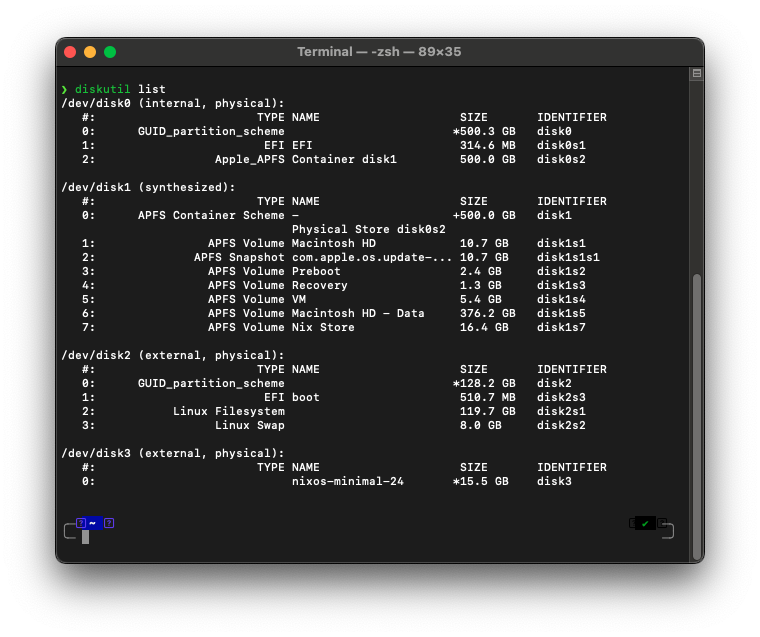
Mine was /dev/disk2
For a Linux machine you should be able to use the command lsblk.
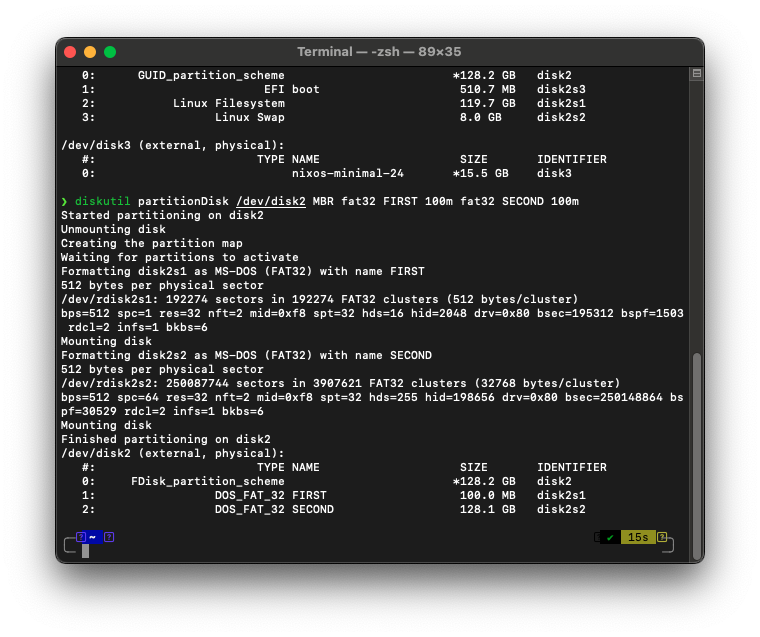
Then I had to use the following command to partition the drive correctly.
Make sure to use the device name of your SD card from diskutil list after diskutil partitionDisk in this command:
|
|
Somehow this command gives us the partitions we want.
I thought it would size the partition named SECOND to 100m, but it made it exactly the size we wanted.
Through this process I learned to not ask too many questions.
# Load the Firmware
Now you should see two volumes mounted to your computer: FIRST and SECOND.
We’re going to load the custom firmware to the drive named FIRST.
Download the firmware from this URL: https://github.com/worproject/rpi5-uefi. You’ll navigate to “Releases” in the bottom right corner:
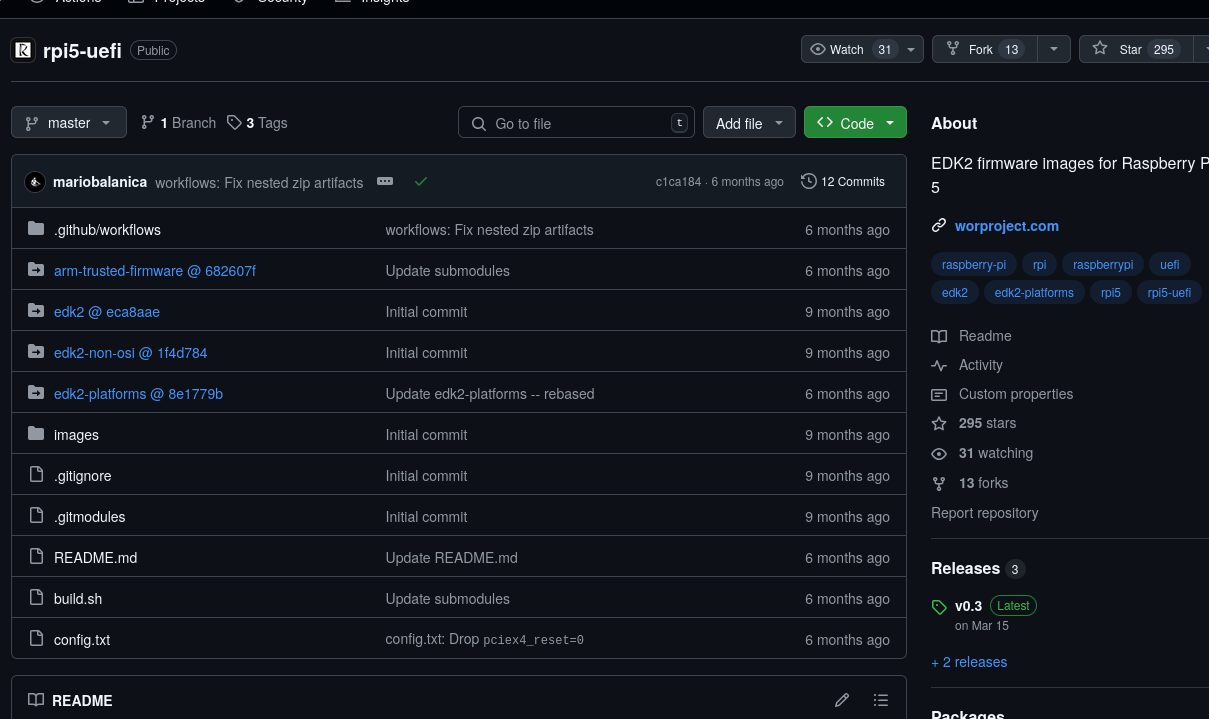
And download the file named RPi5_UEFI_Release_vX.Y.zip.
Unzip the file, and copy all of the files within the unzipped folder to the volume named FIRST.

Eject the SD card and now we can move on to the boot drive.
# Setup the Boot Drive
First, we need to wipe the boot drive and format to FAT32 and MBR like we did earlier with the SD card.
Download the 64-bit ARM version of the Minimal ISO image from the NixOS website:
https://nixos.org/download/#nixos-iso.
The file should be called something like nixos-minimal-new-kernel-24.11pre680873.345c263f2f53-aarch64-linux.
This is the image we will flash to our boot drive.
BalenaEtcher is a free tool for doing just that, and is supported on a lot of OS’es: https://etcher.balena.io/ After that is installed, lanch balenaEtcher and select the ISO we just download. You’ll see this error about a missing partition table, but you can ignore that. We’ll be setting up our own 😈.
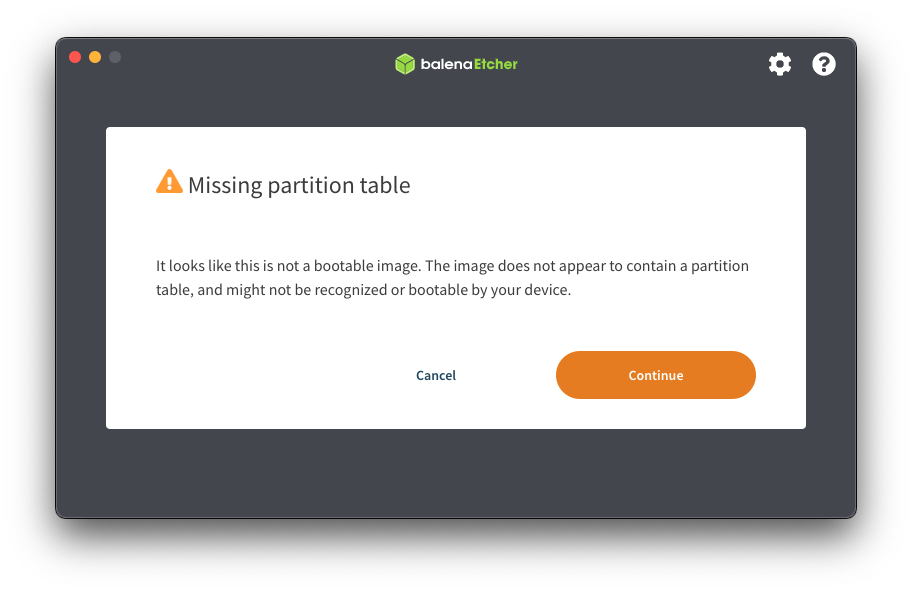
Continue by selecting your boot drive and flashing the ISO to the drive. Sometimes an error will pop up, and I’ve found you might have to try flashing the drive a couple of times to get through the errors. With that done, eject the boot drive and we can turn our attention to the Raspberry Pi.
# Installation
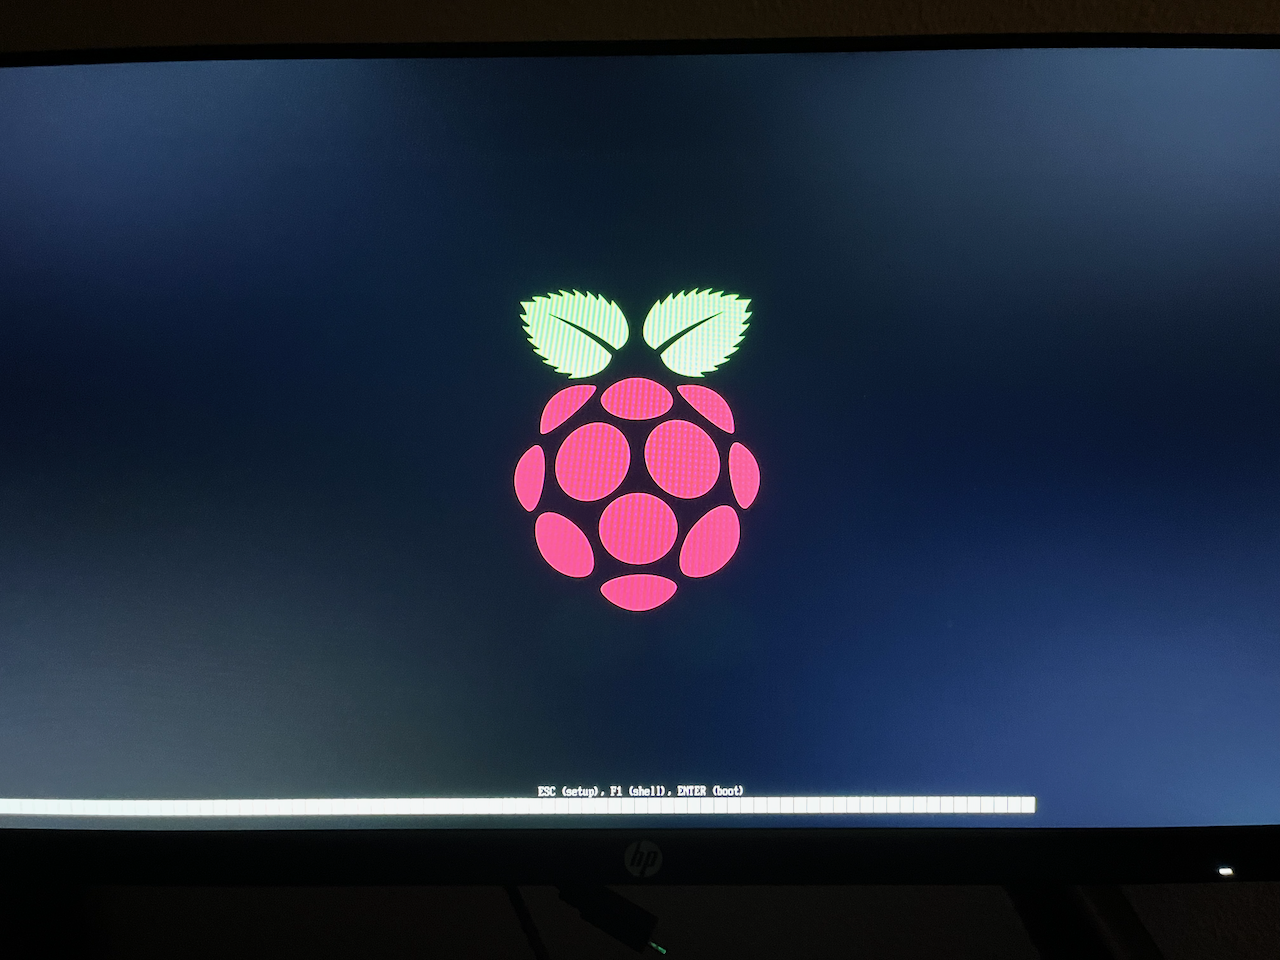
Now that your drives are properly formatted, let’s get on with the actual install. Plug in your SD card, USB drive, HDMI cable, and then the power source. You should be greeted by this screen with the Raspberry Pi logo and a loading bar:
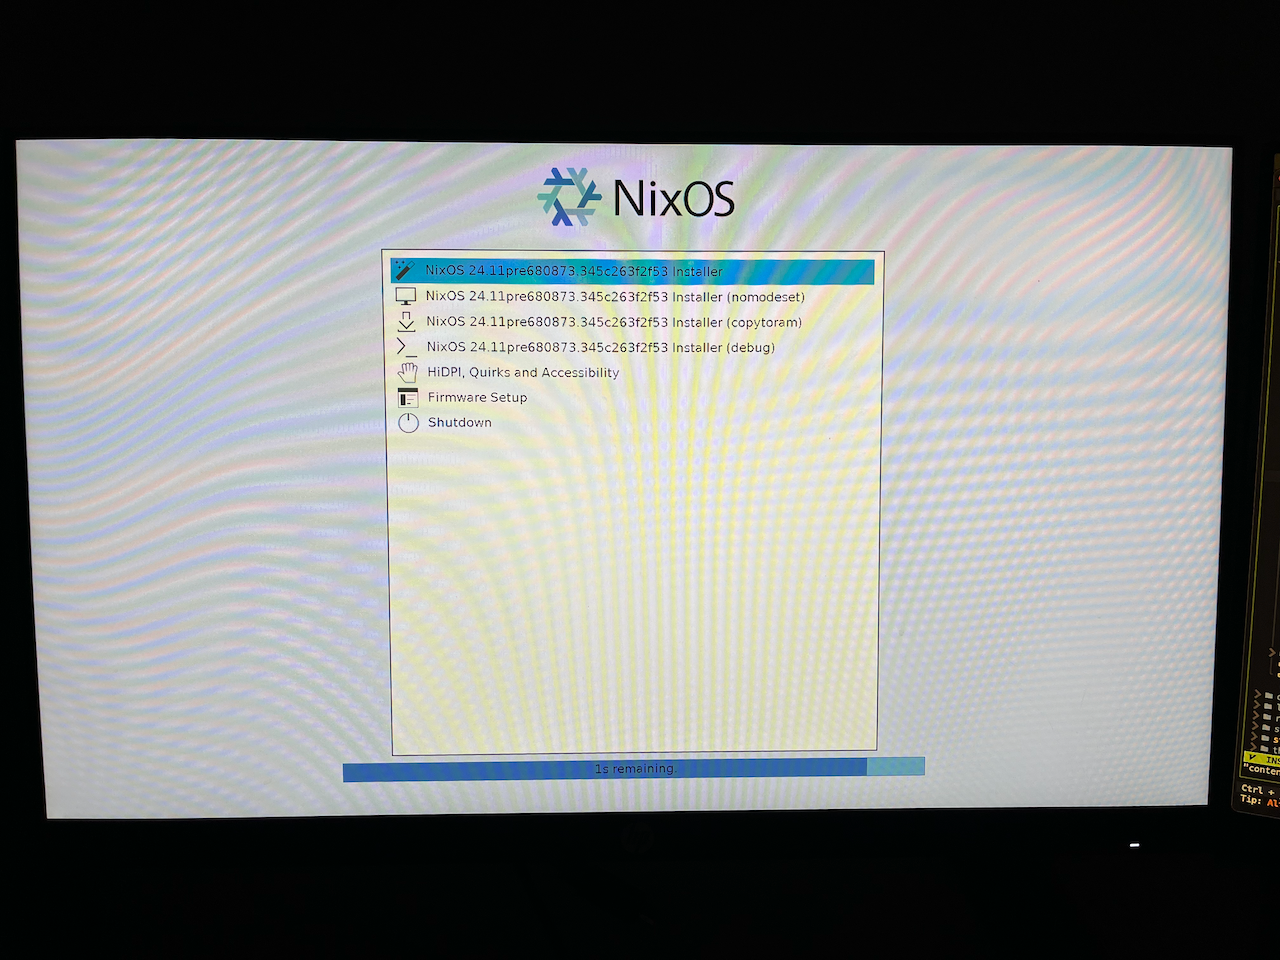
Following that you’ll see the NixOS boot screen. Either select the first option or wait a couple seconds and that’ll be done for you.
From here on out, you’ll be able to follow this guide with some slight modifications to install NixOS: https://nixos.org/manual/nixos/stable/#sec-installation-manual. Here are the steps:
- Set yourself as the root user with
sudo -i - Set up the WiFi with the commands from the section titled “Networking in the installer”. Note: The custom firmware we loaded does not support Ethernet, so we have to use WiFi, just until we can fully install NixOS onto the SD card.
- Unless you love typing on this bare terminal, you may want to use this opportunity to SSH into the Raspberry Pi from your computer. You don’t need a keyboard connected to the RPi for the rest of this guide and can do the rest from SSH. If you don’t want to se up SSH, skip to step 6. Set up a password for your root user with the command
passwd, and your user account withpasswd username. - Find the device’s IP address with
ip addr. Your IP address is under the section inet for wlan0 and is of the format W.X.Y.Z and probably starts with192.168. - SSH into the RPi from your computer with the command
ssh root@ip, and enter your root password from step 3. - Find the SD card name with
lsblk. It will probably start withmmcblk. For me it wasmmcblk0 - We’ll follow the UEFI (GPT) section of the Partition and Formatting part of the NixOS guide. Partition the SD card with the following commands:
|
|
The first command will prompt you to wipe the disk. This is because we’re changing the partition scheme from MBR to GPT. Wiping the disk like this will remove our firmware, but we will manually copy it back in a later step. Otherwise, the RPi will not boot into NixOS.
- Following the Formatting section of the NixOS guide, format the SD card with the following commands:
|
|
- Now to the exciting part - installing the OS. I couldn’t get the
by-labelstuff to work, so here’s how I did it:
|
|
-
Before we run
nixos-installand get this party started for real, let’s make some edits to the generated config. My preferred editor is Vim. NixOS comes with Nano pre-installed. I installed Vim with this command:nix-env -f '<nixpkgs>' -iA vim -
These are the edits I made to the config with the command
vim /mnt/etc/nixos/configuration.nix:
|
|
-
Finally, install NixOS with
nixos-install -
Before we reboot, don’t forget to copy over the firmware to the SD card. This was the command I used to do that from my Mac:
|
|
-
Type
rebootand hit enter. -
There’s one last step before we can enjoy the RPi, and it’s taken from https://nixos.wiki/wiki/NixOS_on_ARM/Raspberry_Pi_5:
For the vendor kernel to boot properly, you must switch from ACPI to Device Tree in the UEFI settings (at Device Manager -> Raspberry Pi Configuration -> ACPI / Device Tree -> System Table Mode).
Now you should be all set to configure your Raspberry Pi to your heart’s content.
# Resources
- https://nix.dev/tutorials/nixos/installing-nixos-on-a-raspberry-pi.html
- https://nixos.wiki/wiki/NixOS_on_ARM/Raspberry_Pi_5
- https://nixos.wiki/wiki/NixOS_on_ARM/UEFI
I'm a freelance software developer located in Denver, Colorado. If you're
interested in working together or would just like to say hi you can reach me
at me@ this domain.